Convert a Text field to Proper Case using Power Automate
One shortcoming to Power Automate is the lack of a “proper case” function for workflow when inserting data via an Expression. Microsoft implemented the “toLower()” and “toUpper()” method, but why not the “proper()” method like they have within Power Platform?
We’ll probably never know.
However, there is a way to do it via brute force within a workflow.
This post will detail how to convert a text field to proper case using Power Automate.
Let’s get started
The example below is a child/component flow, so you can reuse it anywhere and for any textual data needed to be in proper case format:

Start with the Flow’s Trigger and Initialize Two Variables

First step in the flow is the action “Manually trigger a flow”. An input parameter is needed for the string to convert. I’ve called it “Input String” with the description “The String to convert to proper case”.
After that, initialize two variables. For this example, they are:
- Input String
- the text to convert to proper case. We’re going to assign this to the input from the trigger action. I like to do this so if the trigger changes for any reason, we only have to update it in one action instead of replacing the trigger value everywhere it’s used.
- Word Array
- holds every individual “word” from Input String split at spaces
Now for the juicy bits…
Check if Input String is empty
Check if the Input String variable is empty with the following expression:
|
1 |
empty(variables('Input String')) is equal to null |
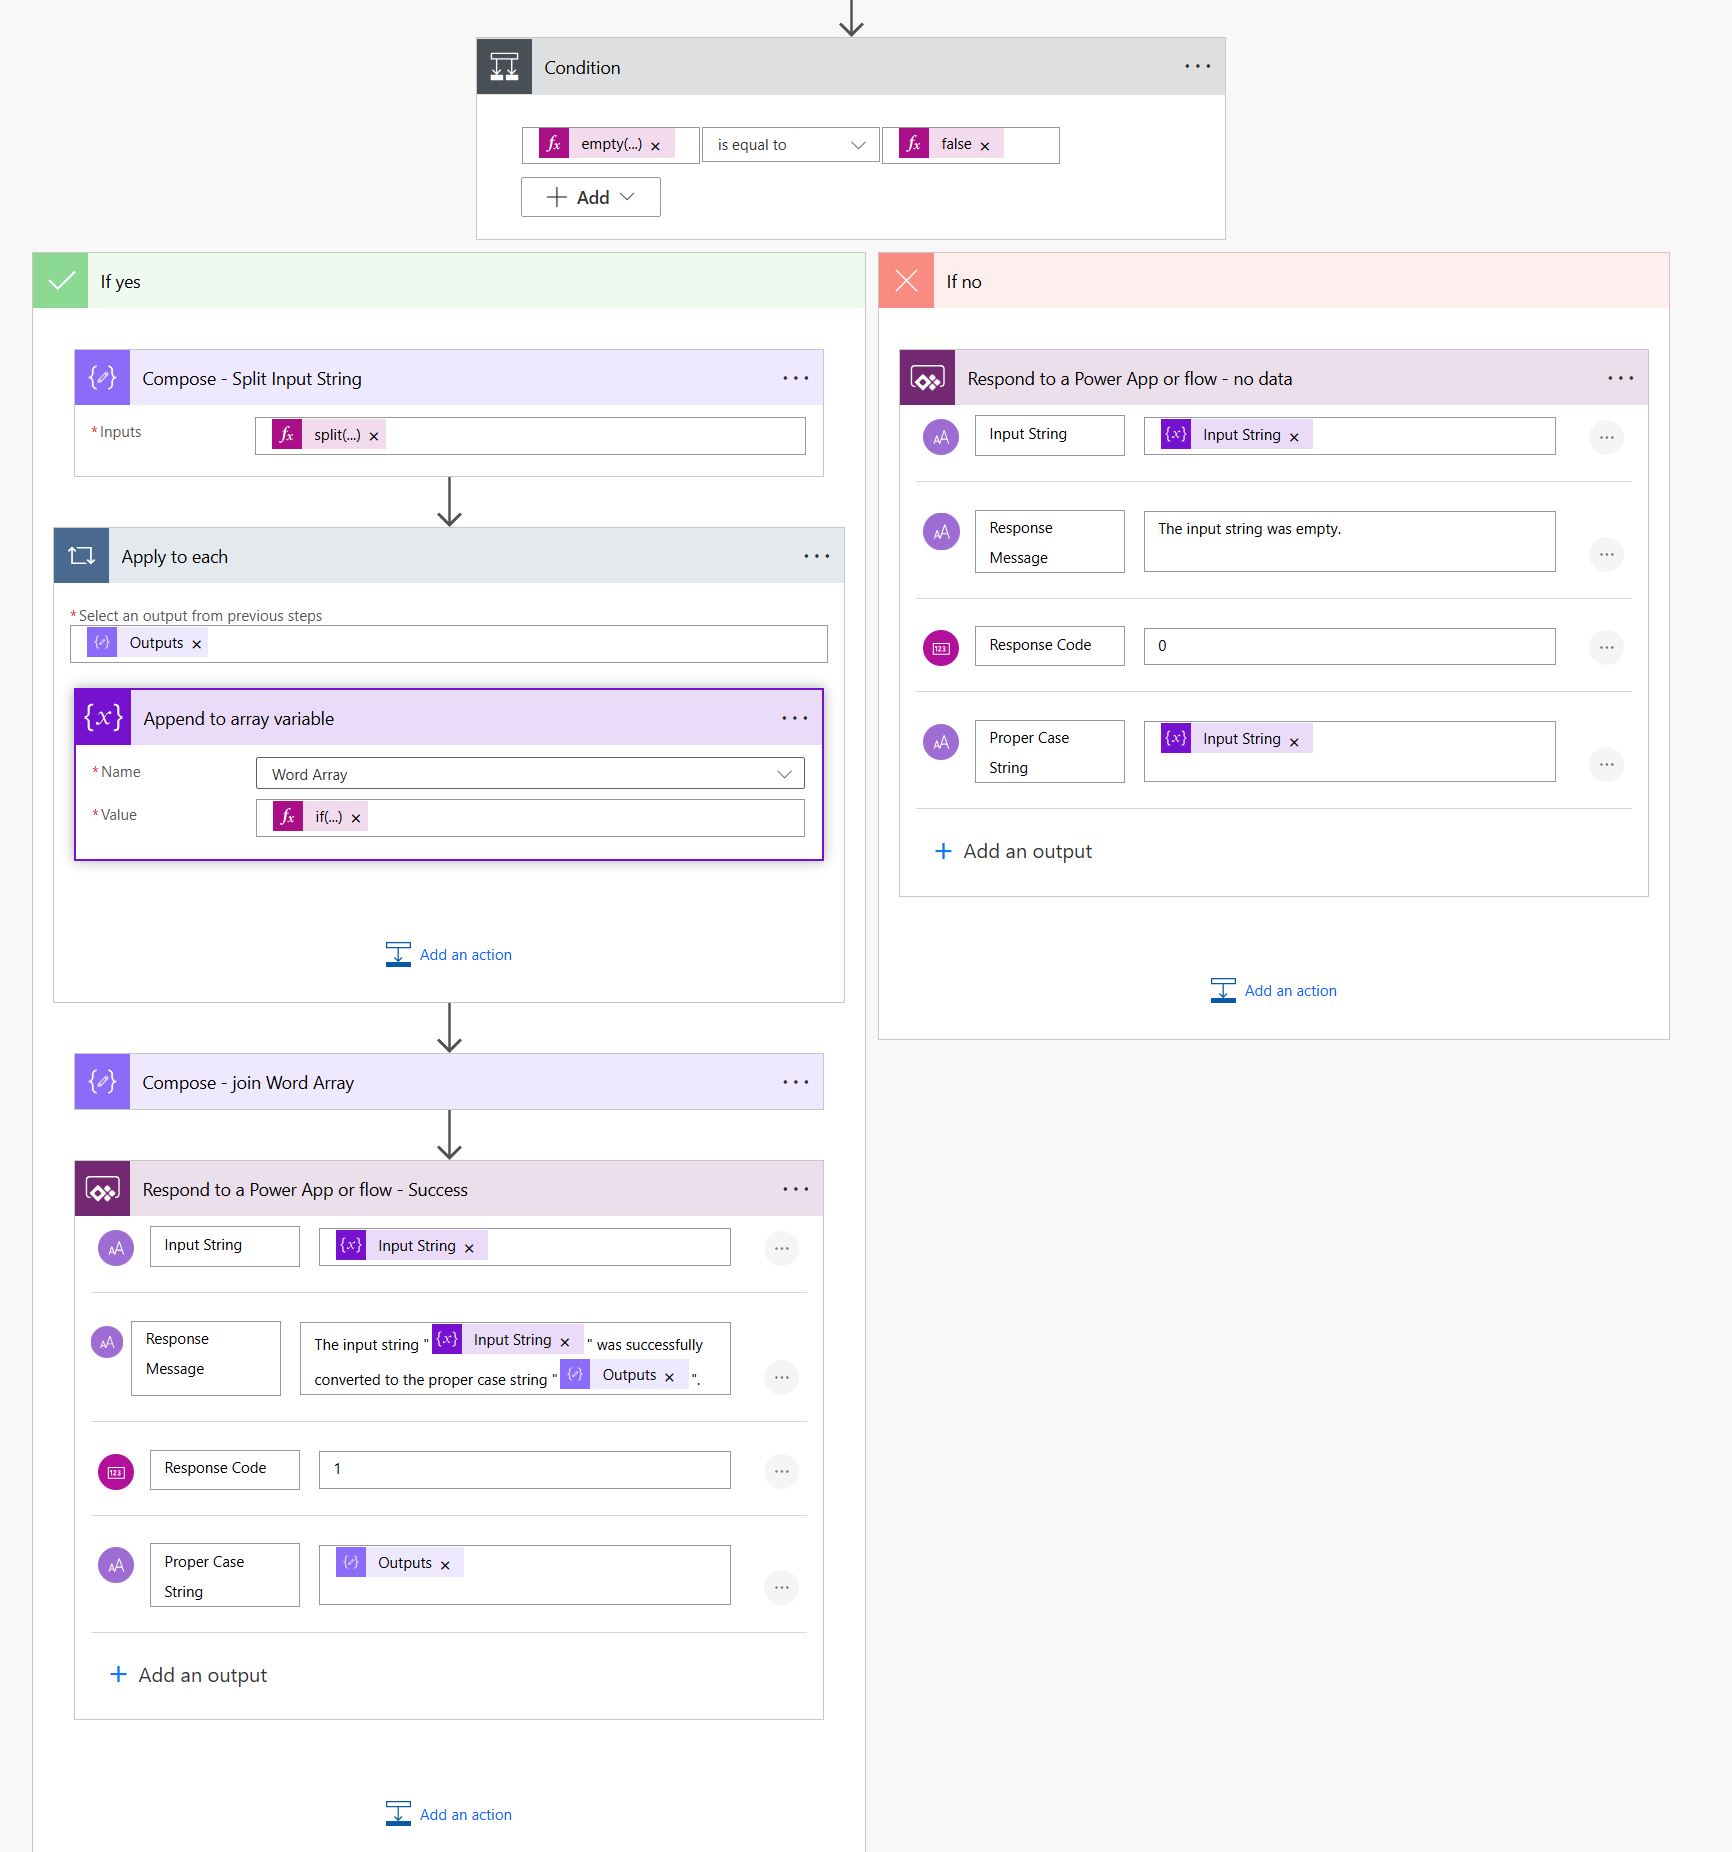
If Input String is empty
Send a response to the parent flow with the following output values. Not all of these are necessary – it depends on what the parent flow would need/want/expect in return:
- Input String
- Returns a copy of the input string so the parent knows the exact value it sent to the child
- Response Message
- A response message so the parent has it for logging (or other) purposes if needed
- Response Code
- Some systems like numeric values for database and other fields.
- Proper Case String
- The converted string. In this case, it should be the same as the input string provided since no conversion was performed
If Input String isn’t empty
1) Use a Compose action to split the Input String into individual words
|
1 |
split(variables('Input String'), ' ') |
2) Loop through every resulting word from the Compose action output
3) Append each word to the array variable while converting it to proper case. To do this, we have to check if the current word is 1 character. If so, we can just use the toUpper method; if not, we concatenate two strings which is just the first character converted toUpper and the rest of the characters converted toLower:
|
1 2 3 4 5 6 |
if ( equals(length(items('Apply_to_each')),1), toUpper(items('Apply_to_each')), concat(first(toUpper(items('Apply_to_each'))),toLower(substring(items('Apply_to_each'),1,sub(length(items('Apply_to_each')),1)))) ) |
4) Using a Compose action again, we join the convert words in Word Array separated by a space ‘ ‘ character.
|
1 |
join(variables('Word Array'), ' ') |
5) Send a response to the parent flow with the following output values. Not all of these are necessary – it depends on what the parent flow would need/want/expect in return:
- Input String
- Returns a copy of the input string so the parent knows the exact value it sent to the child
- Response Message
- A response message so the parent has it for logging (or other) purposes if needed
- Response Code
- Some systems like numeric values for database and other fields.
- Proper Case String
- The converted string.
Run tests to make sure it works as expected!
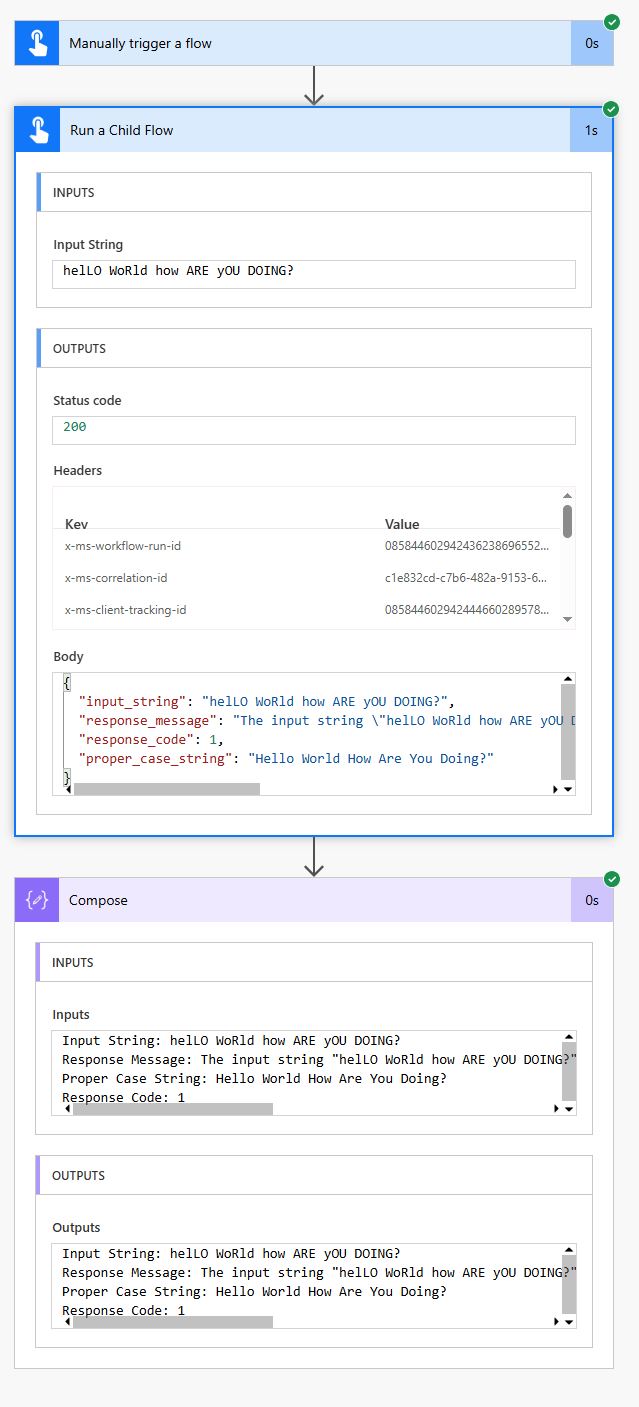
To run a test, a parent flow was created which calls the newly created child flow. Below are the results of a test.
Here’s a simple parent flow’s output which just comprised of an action calling the child flow and using a compose action to log the output. The inputs and outputs are clearly visible:
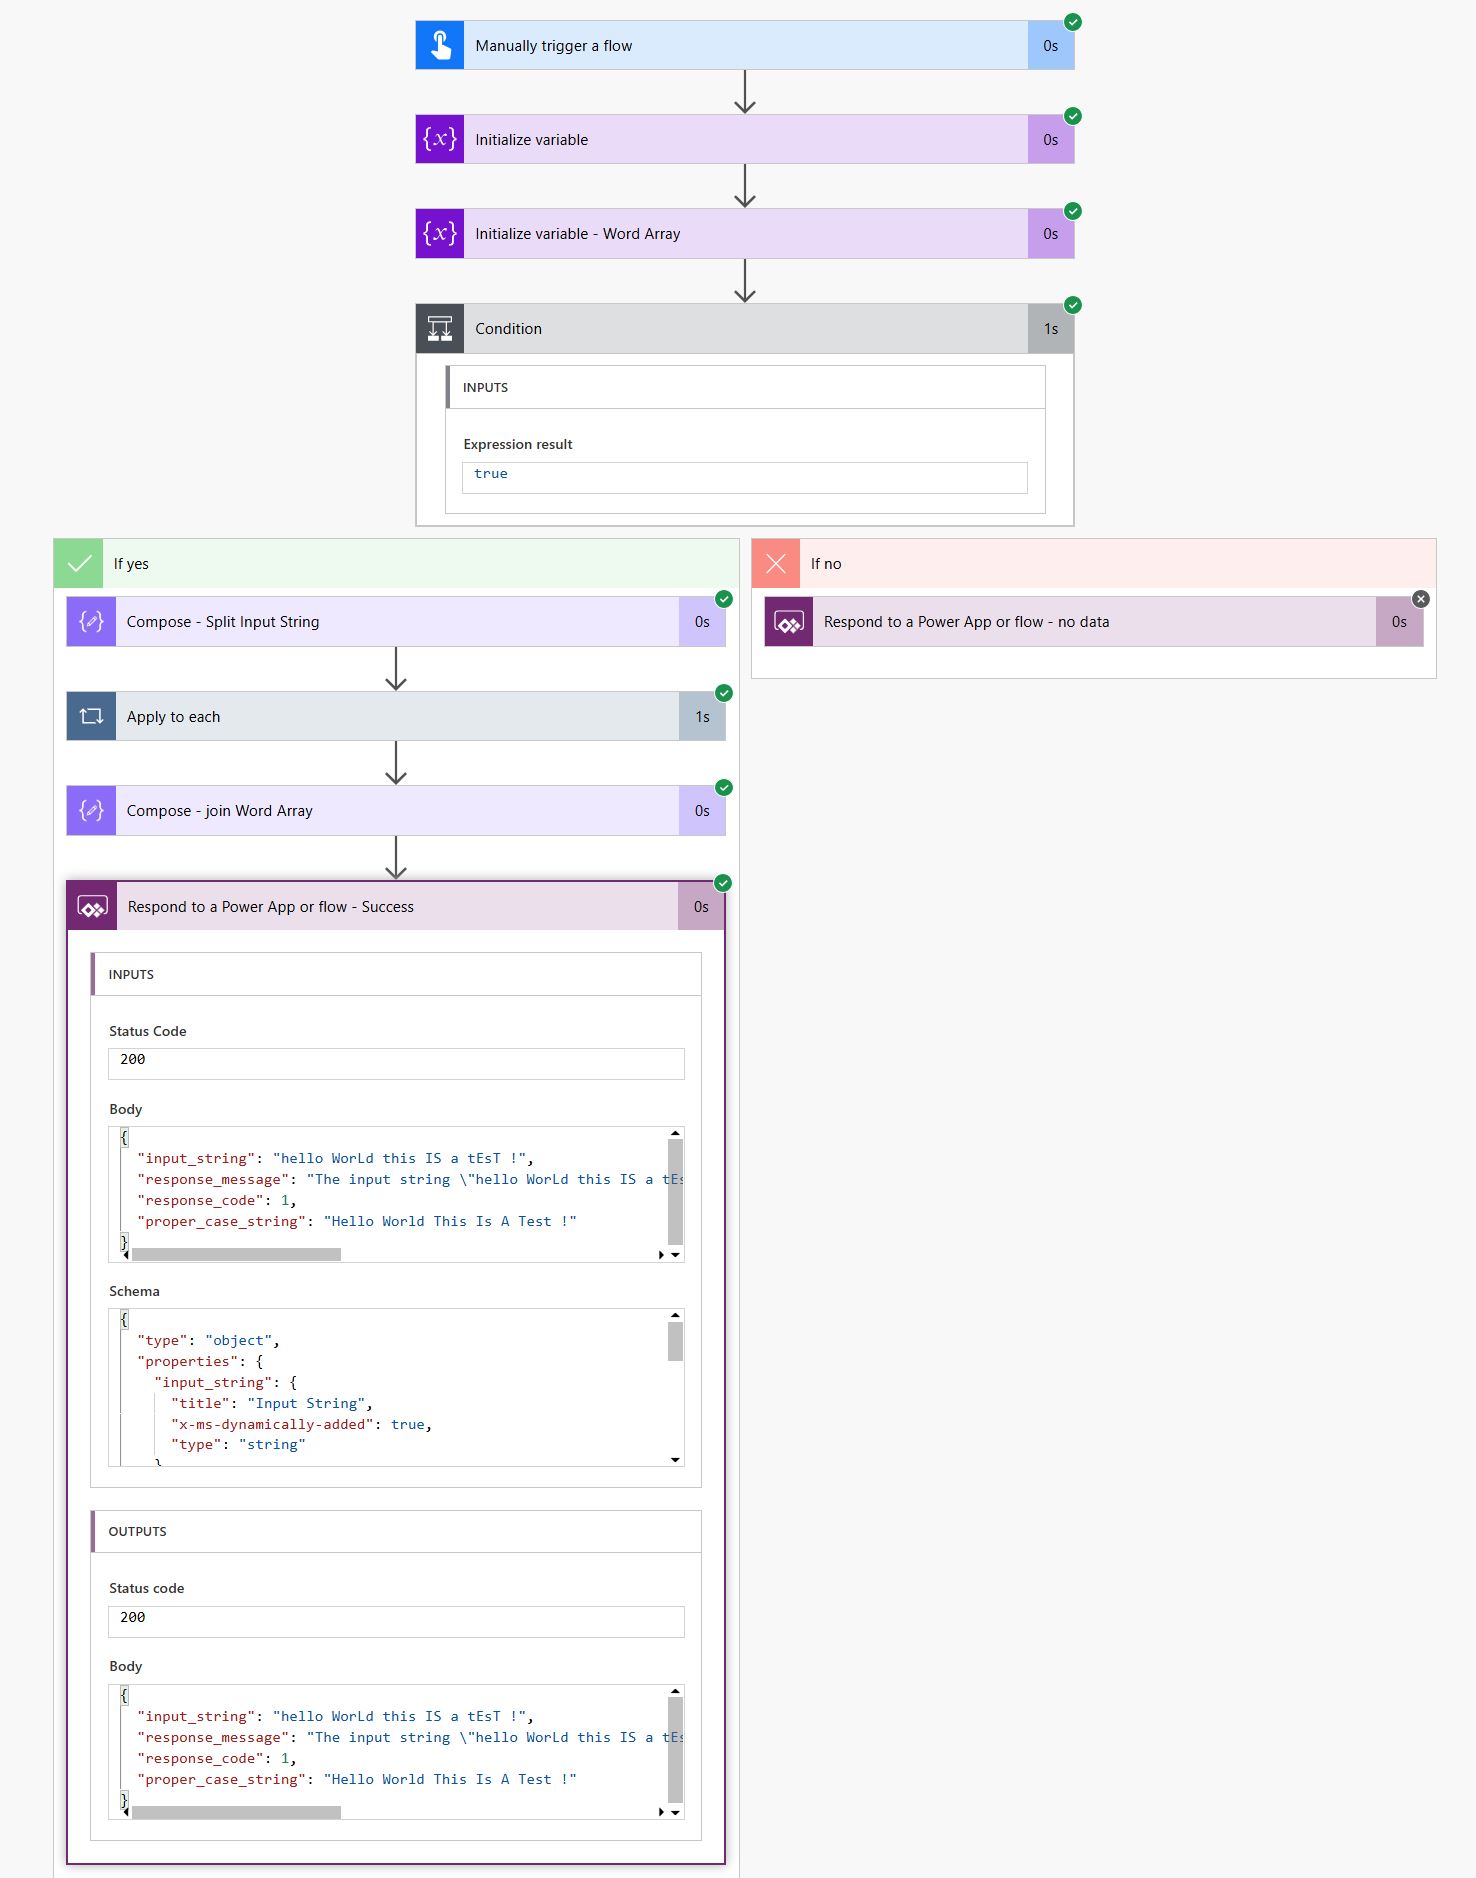
Here’s the child flow. In the last “Respond to a Power App of flow – Success” action of the child flow, you can see the input provide along with all the outputs:
That’s all that is needed to convert a text field to proper case using Power Automate
Obviously chop and change to fit your individual needs.
As of this blog post Microsoft still hasn’t included this feature by default in Power Automate.
Until they do, happy Power Automate building!
Please leave comments if you have any Power Automate tricks or tips of your own to share!